I never was a big fan of hot sauces until I tried making one myself. Fermenting the chilies up front brings the result to a new level. And as you are in full control you can choose the spiciness and flavors to match exactly what you want.
This recipe was heavily inspired by this video.
Hot chilies can irritate your skin and do actual harm if you get them in your eyes. If you go for habaneros or alike I would highly recommend to use cloves cutting them. Ensure to wash all used equipment very well after usage (best wearing fresh cloves). Clean all surfaces and wash your hands very well afterward.
Fermentation Overview
When fermenting stuff you basically let it sit in a water salt mix for some time. Other than the % of salt used there is only one important rule to follow: reduce air contact of any ingredients. Try to keep everything submerged. You can do so with fermentation weights, using wrapping foil or by filling a plastic bag with a bit of water and top of the vessel with that.
As a rule of thumb you want to aim for 2% of salt for most vegetables and 3% for chilies as they are more at risk to develop mold during the process. Increasing the salt level will make the end result too salty, so if you want to go with a plain chili hot sauce stick with 3%. However, I usually blend my hot sauces with fruits like mango after the fermentation step. As this will reduce the overall salt level it is ok to use more during fermentation. In that case you can go up to 5%.
- x gram chilies
- y gram water
- 3-5% of total weight (x+y) salt
Note: do not calculate the salt by using the weight of the bought chilies. You need to weight them once seeded and cut (see instructions below).
You can let it ferment longer for a more intense flavor. I personally go between 2-3 months for this fermentation.
Ingredients
Fermentation
The chosen chilies will affect the flavor, but also how spicy your hot sauce will be. Depending on where you live you will have access to a lot of variations, though here there are only two types that I would consider, habaneros and thai chilies. I like the taste of habaneros better, but they are a bit too spicy for my taste. For this version I there for choose to blend both variations:
- 200g habaneros (full weight)
- 240g red thai chili (full weight)
- salt (check instructions!)
Hot Sauce
- fermented chilies
- 3 garlic cloves
- 90g natural tasting oil
- 150g white vinegar
- 400g ripe mango (already peeled and seeded)
Instructions
Fermentation
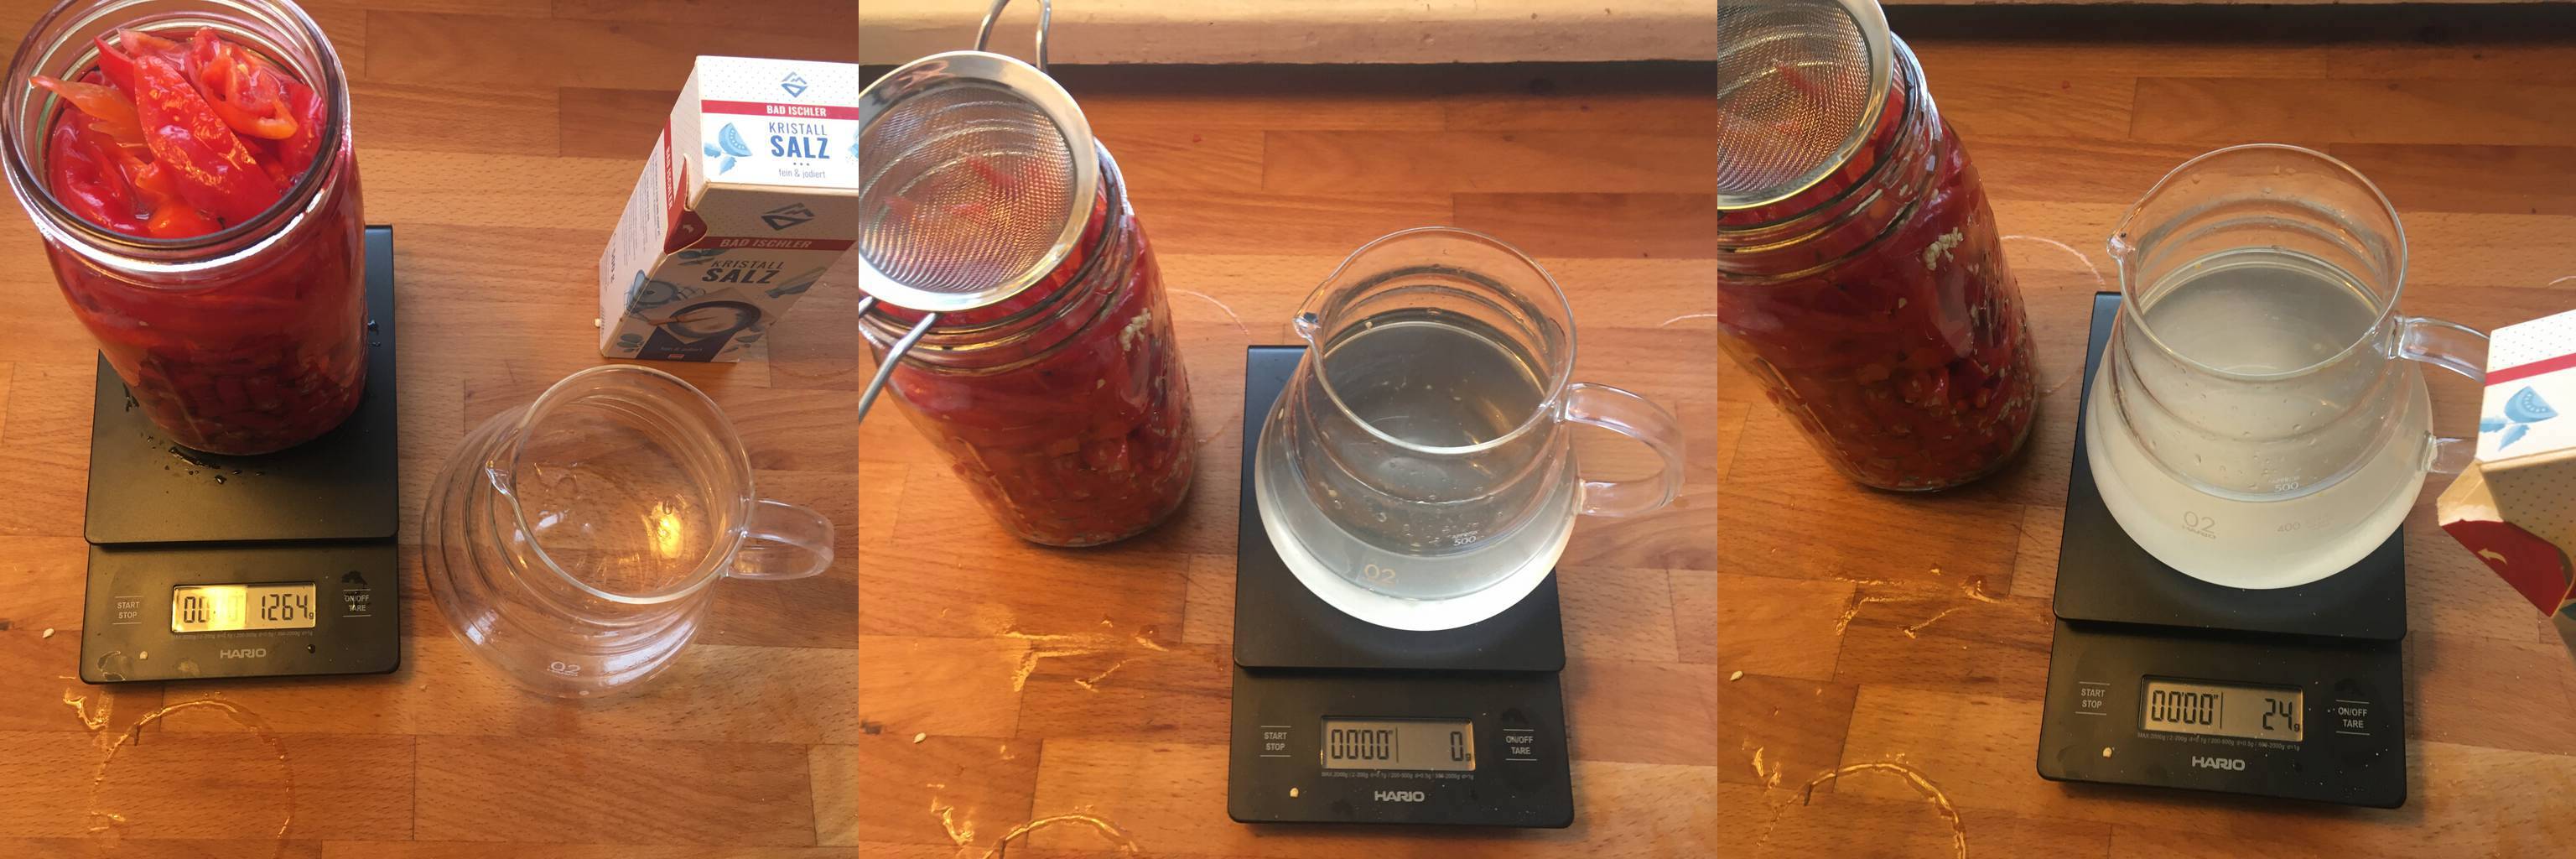
Weight your fermentation vessel and write down the weight. This will help you afterward.
Wash the chilies. Remove the stems and, optional, remove the seeds. I only do this with habaneros as this does reduce the spiciness by a lot.
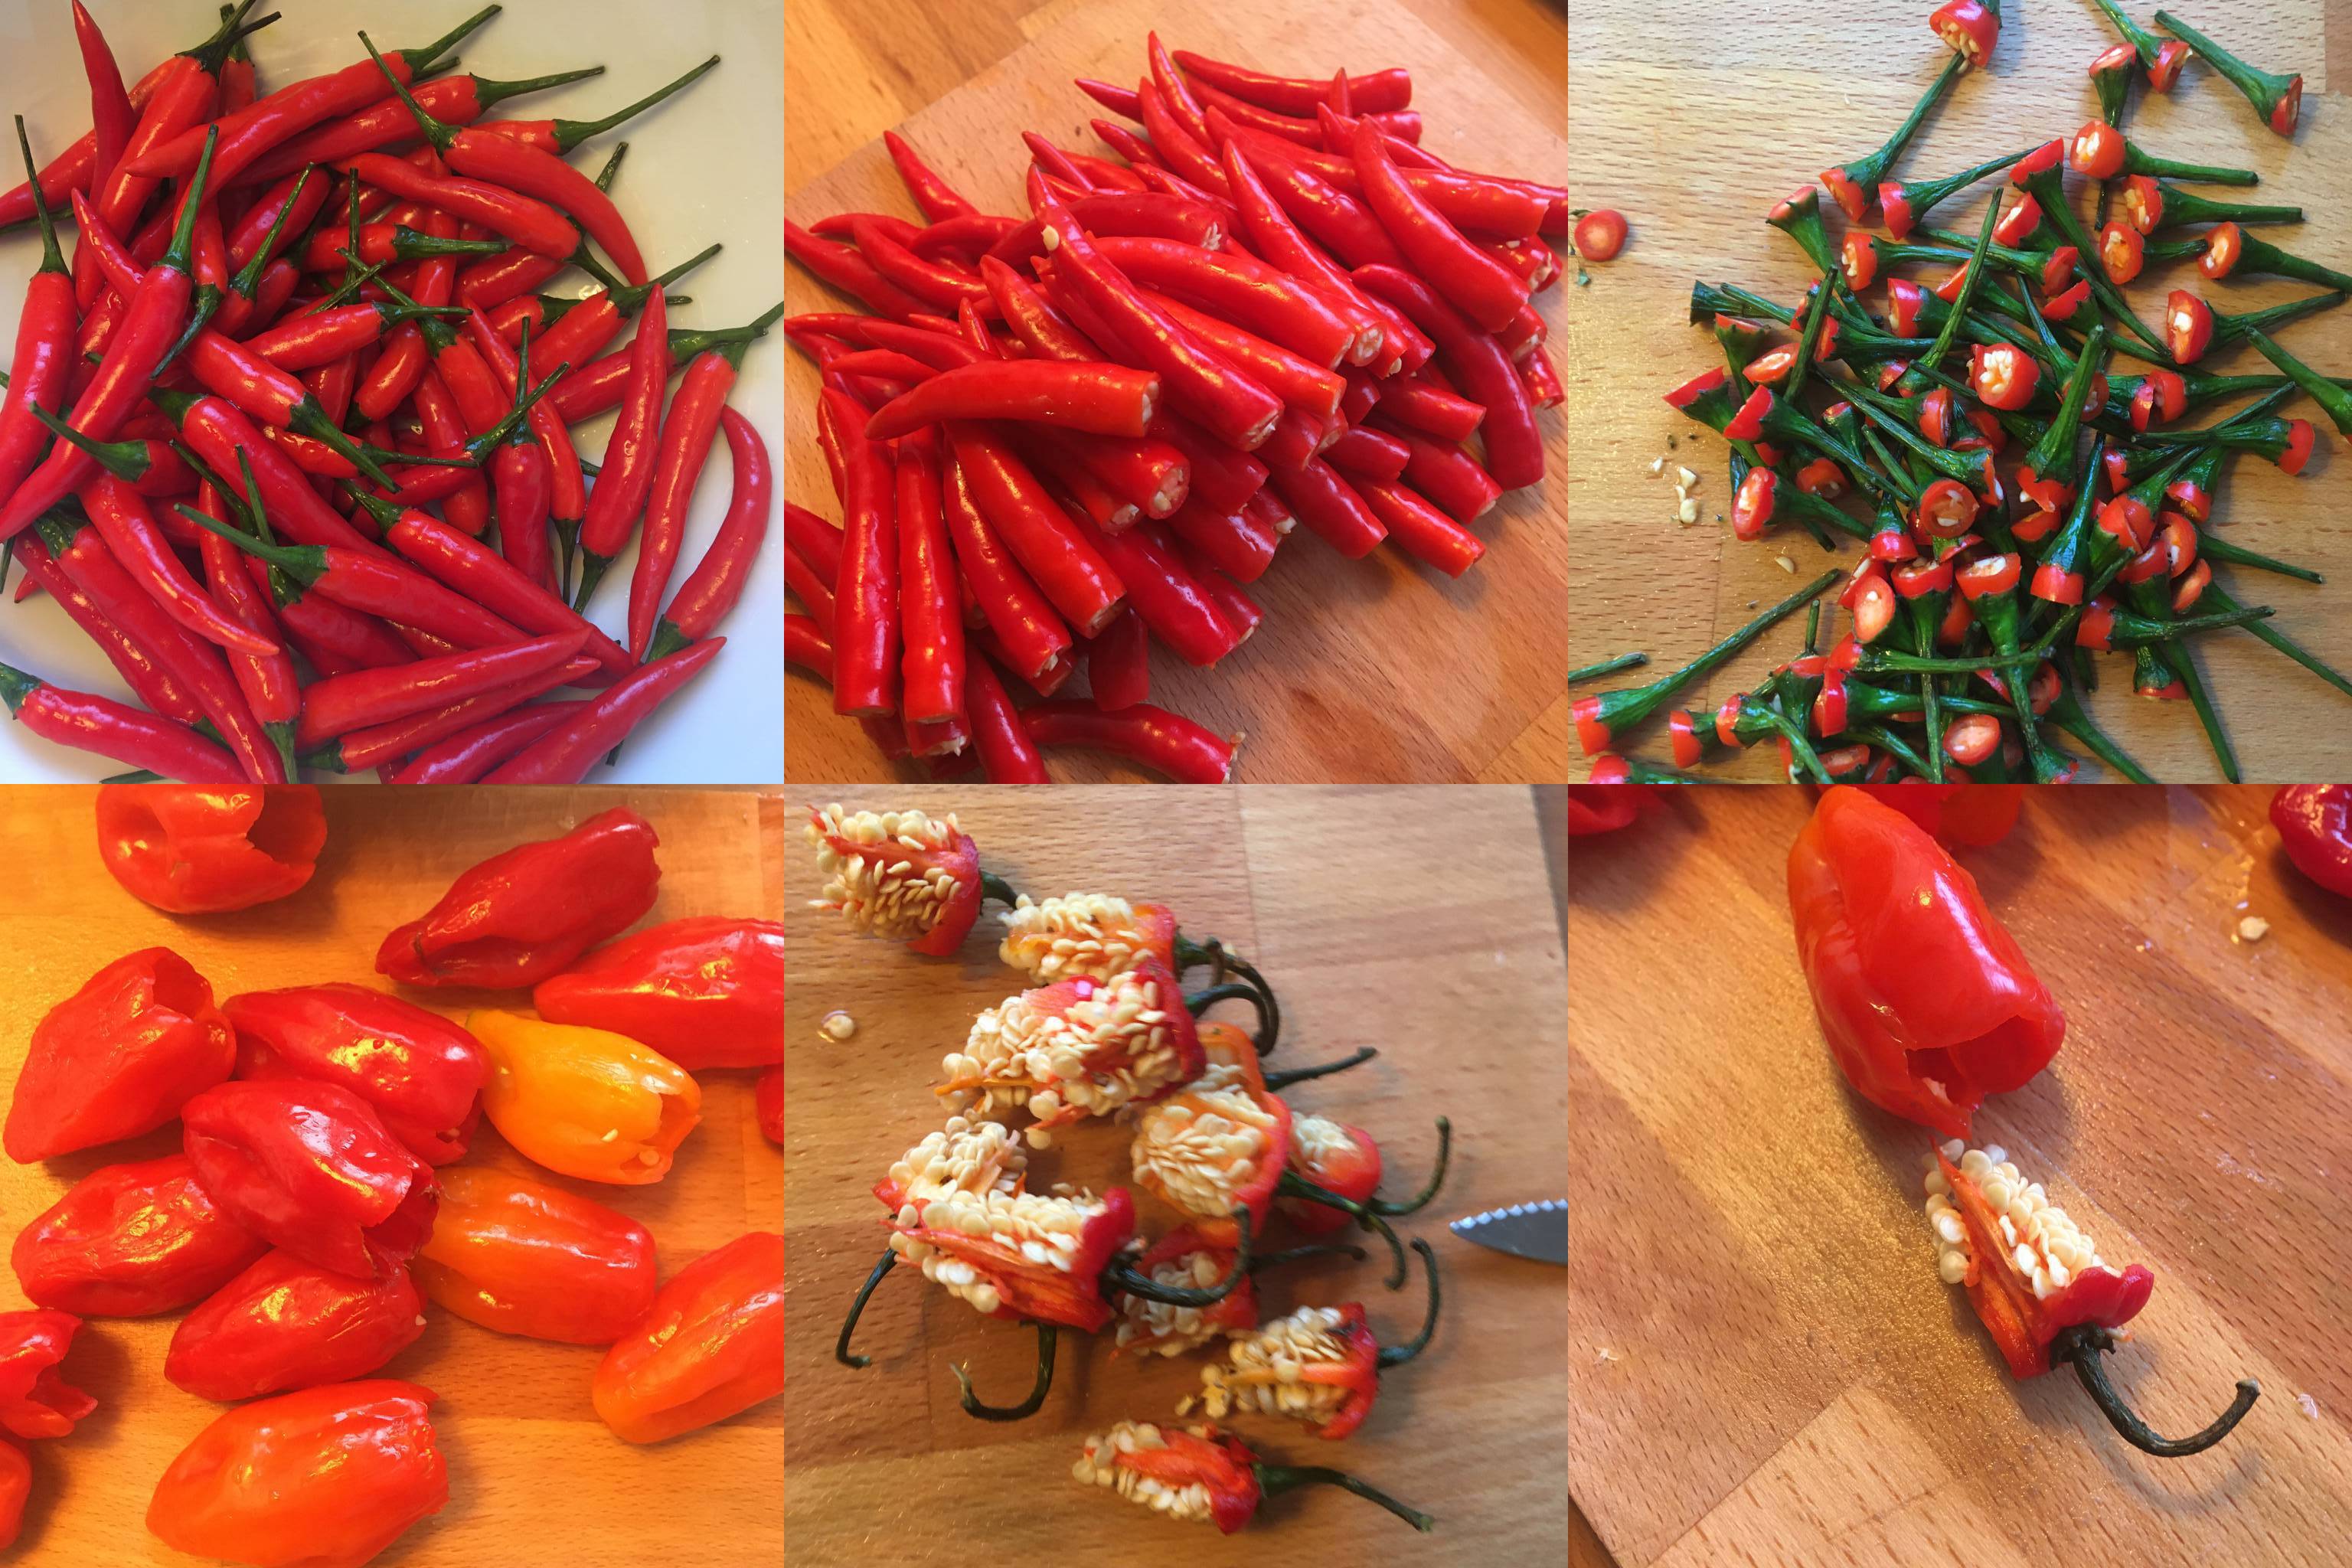
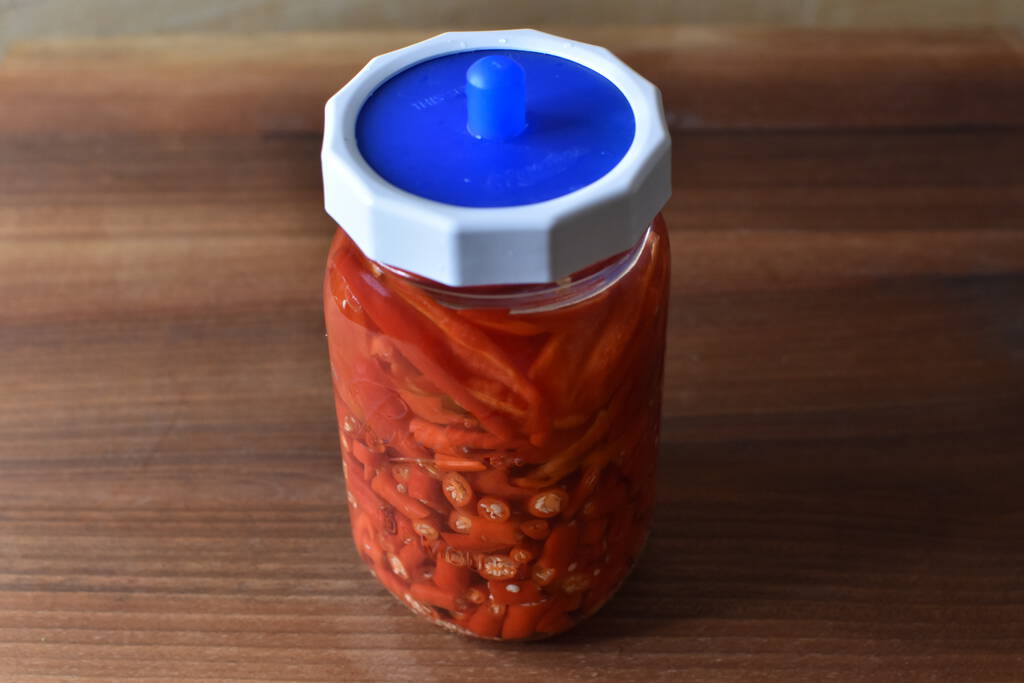
Cut the chilies into smaller parts and place them in your vessel. The goal is to cut them in a way so no air pockets can form once you add the water. Start with the smaller pieces and add the bigger ones on top. This will help keeping stuff submerged. The weight of the chilies that are now in the jar is the weight that actually counts, not the full weight after buying them!
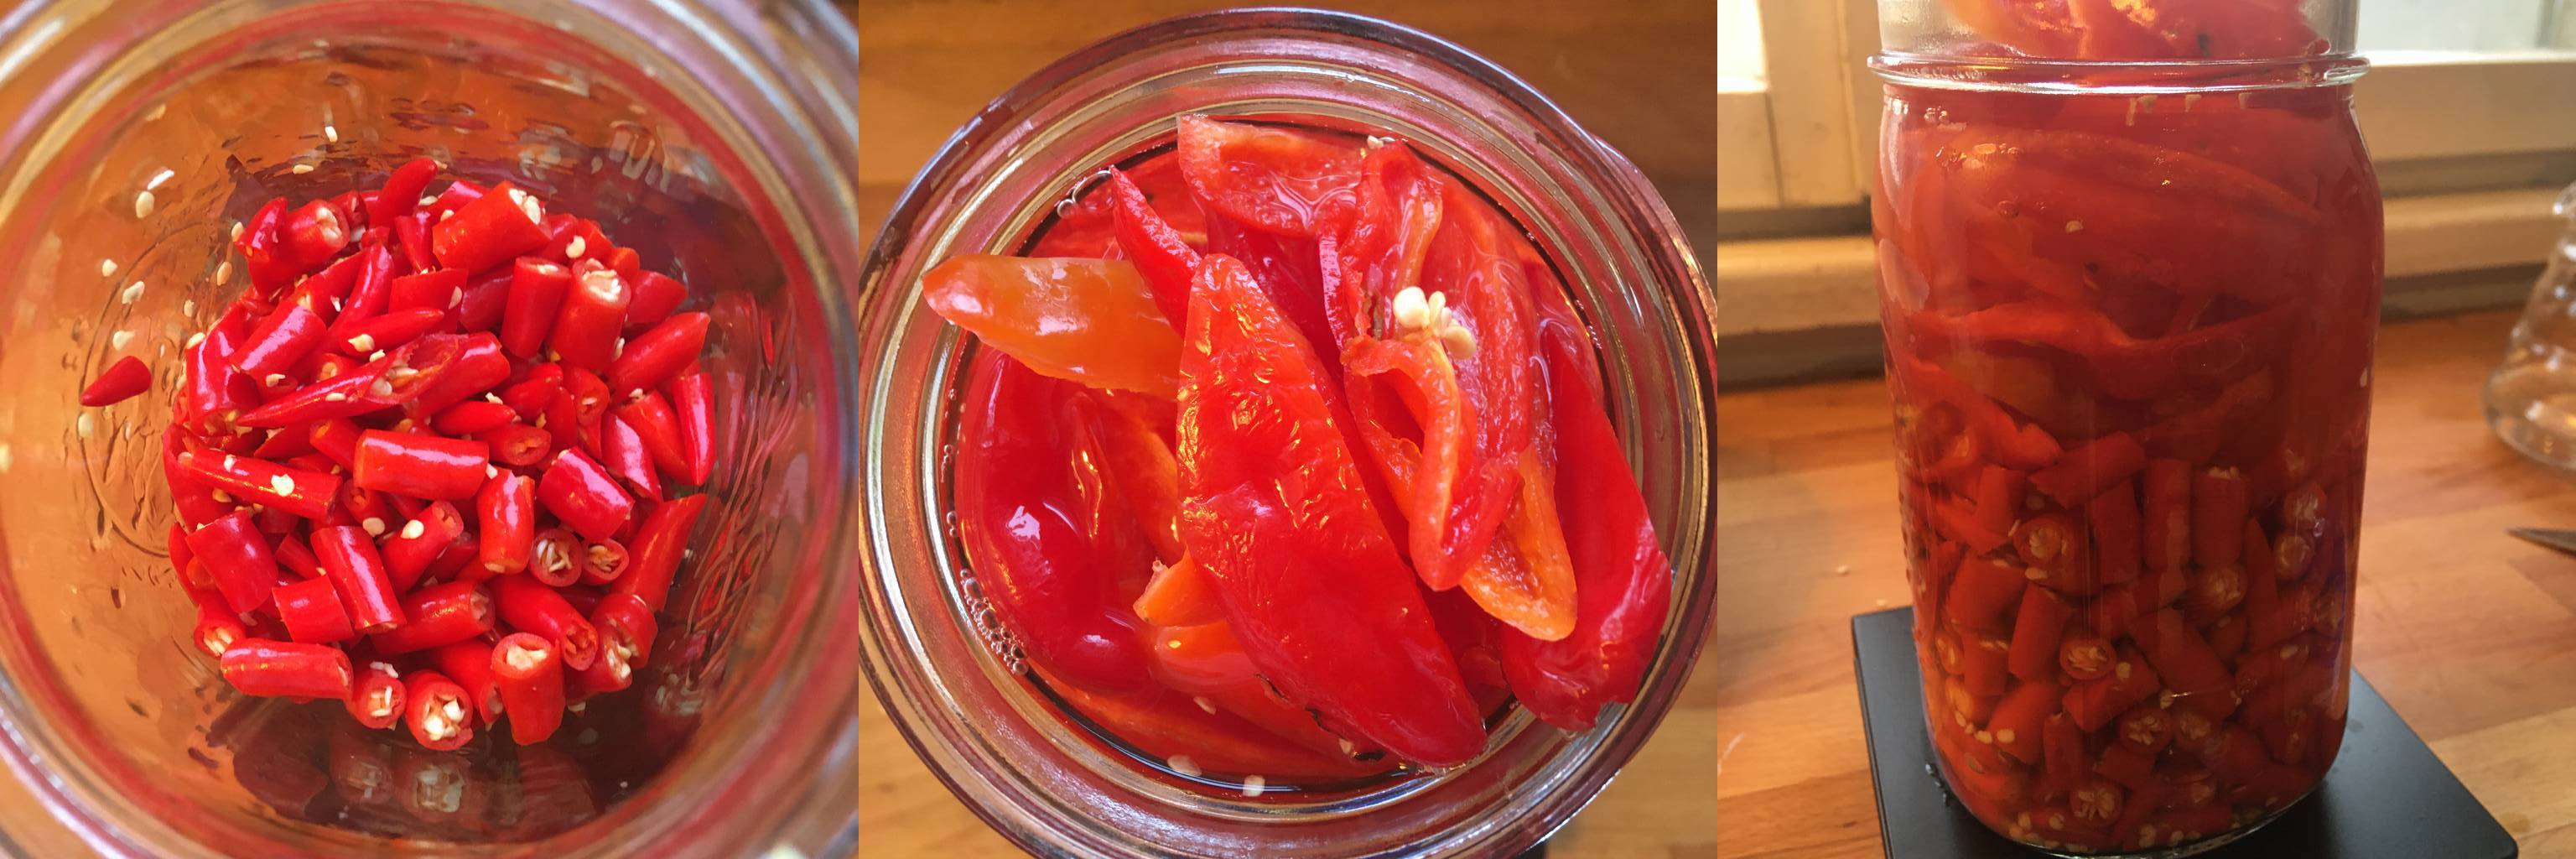
Once done, add cold water. You do not want the water to reach to the vessels neck as shown in the picture, I ended up removing water afterward.
Now measure the total weight and subtract the fermentation vessels weight. This is the weight we actually calculate the salt from. If you want a plain hot sauce, go for 3% salt. If you want to add fruits later on you can go higher (5%).
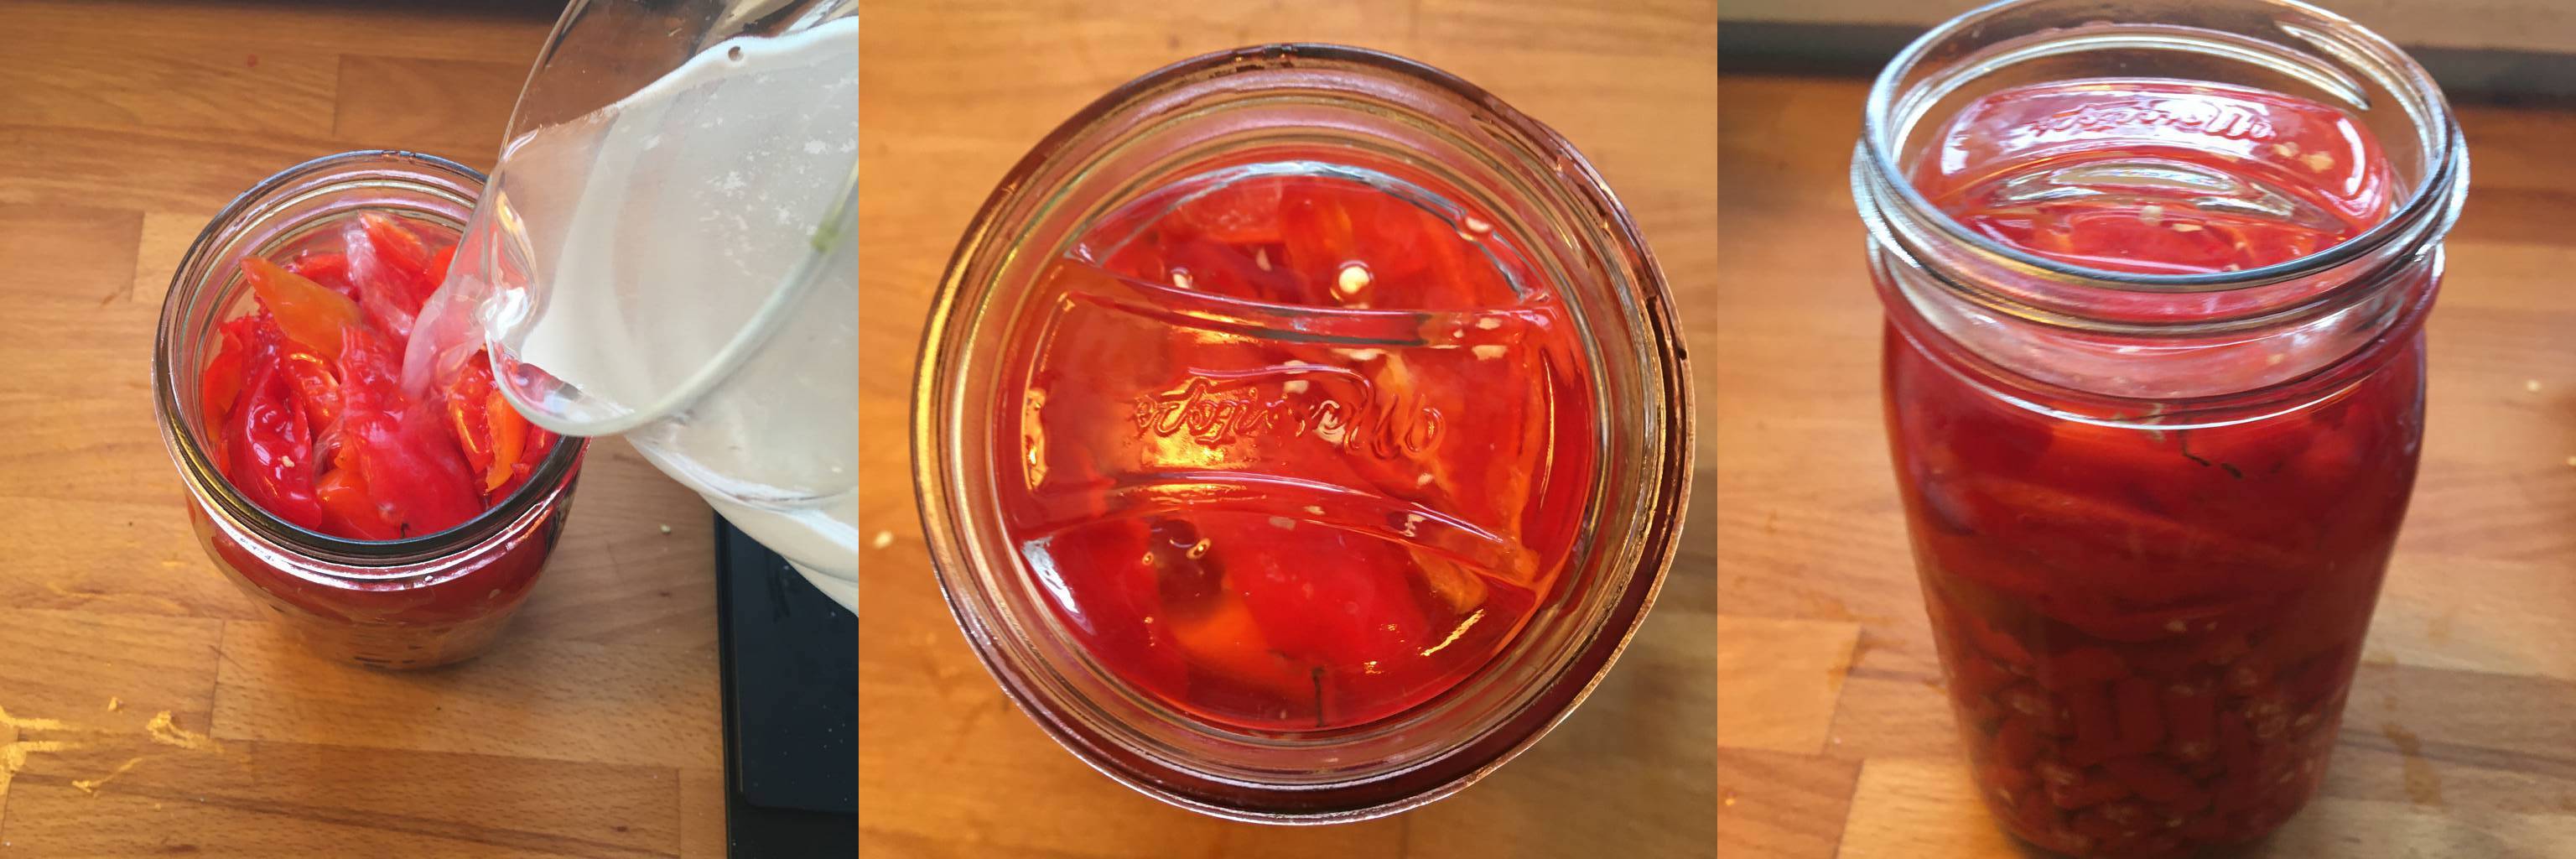
Now you have to mix in the salt into the water. This will be very tricky in your fermentation vessel, so get another one. Sieve out most the water from that vessel into the second one and mix the water and the salt there. Stir until everything dissolved and pour back into your fermentation vessel.
Ensure that the chilies stay submerged (with one of the proposed methods above). As with every fermentation do not fully close the vessel or the produced pressure might break it.
Fermentation time can be between 1 week to several months. Longer ones will result in a more sour tangy result. Especially the thai chilies will produce a very umami flavor in a longer one that is perfect for hot sauces.
During fermentation the water will get cloudy. This is normal and no issue. Sometimes white yeast can form at the top of the liquid. This is also ok, just remove it with a clean spoon. The only thing you really have to be careful with is black mold. If black mold forms, throw everything away and start from scratch.
I let this batch sit for 2.5 months.
Basic Hot Sauce
Cut the garlic cloves into thin slices and fry them in a small pan until lightly golden. If you notice that they get golden best pour them into another cold vessel. In case they get too dark the taste will be very bitter. Do not use that mix, rather start over!
Remove the brine from the vessel. I usually do not use any of it in my hot sauce as it just adds a lot of spice but not that much flavor overall.
The brine (liquid in your fermentation jar) has absorbed a lot of spiciness of your chilies. Handle it with care and clean surface or tool that it comes in contact with afterward.
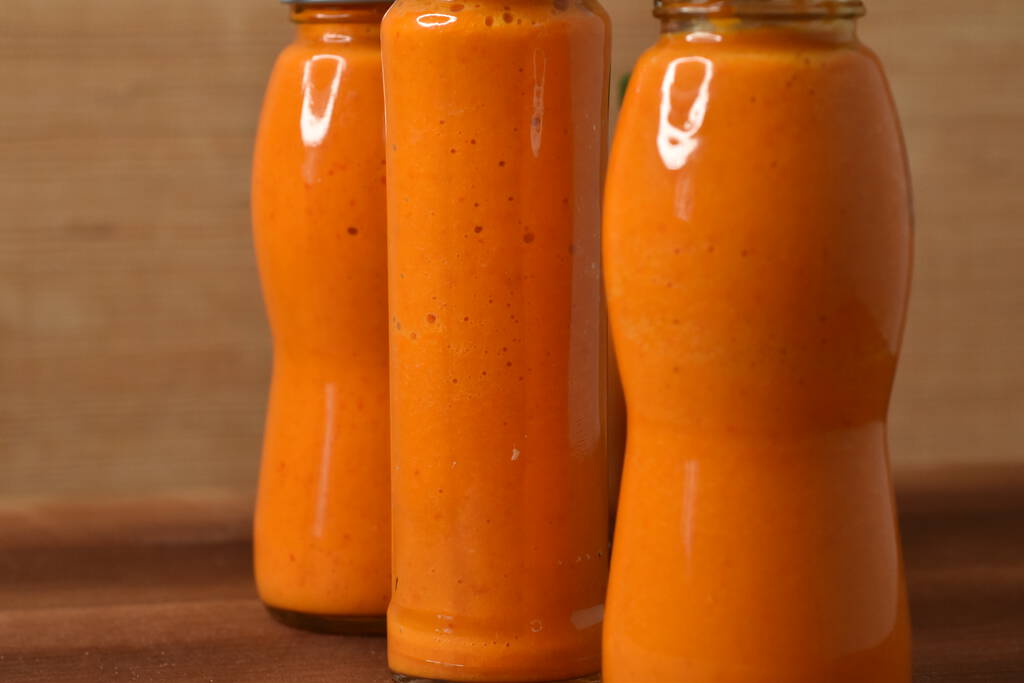
Add the fermented chilies, vinegar and fried garlic in your blender. In case you go for a fruity variant, add your fruits as well. Blend them on high speed until smooth. Start to slowly pour in half of the garlic oil. Fill the hot sauce in bottles and store them in the fridge.

Tips
- If you want to store it on shelf you can also bring it to a simmer for about 15 minutes and fill it in clean glasses (same as you would bottle marmalade).
- If you want to make a fruity variant it is very important that you use ripe fruits. In case you do not have those at hand yet, prepare the hot sauce without them, store them in the fridge and blend the fruits in once you got them.