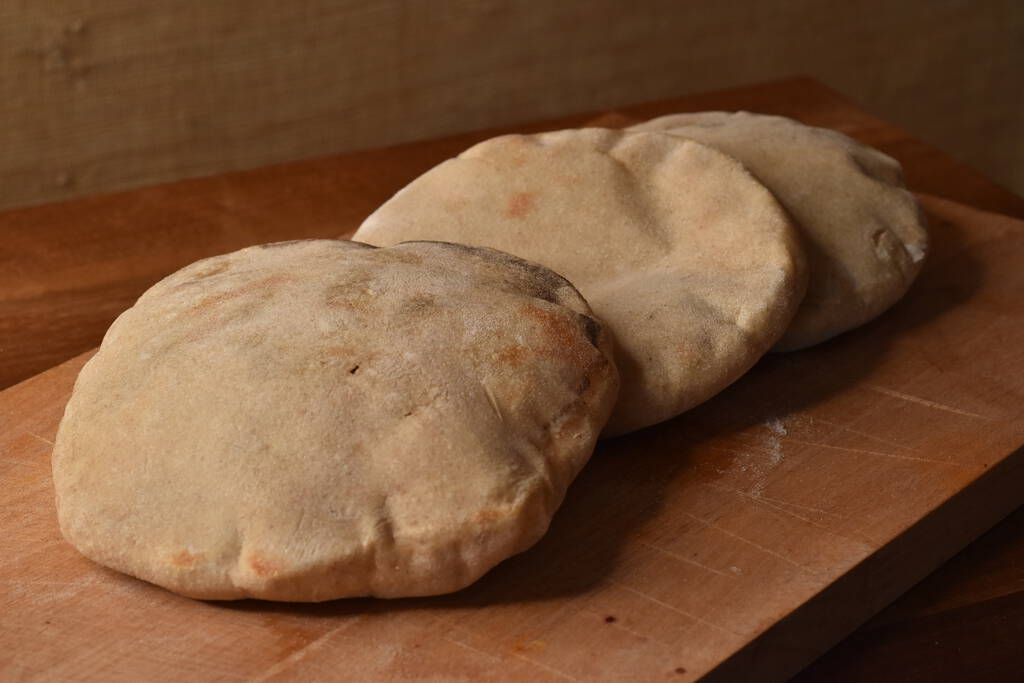
Pita bread was on my todo list for quite a while. As it forms one big air pocket in the middle during baking it is super easy to fill. The main goal for this project was to bake pita bread in big batches and freeze them so one can toast them up at any given time.
Ingredients
- 300g fine wheat flour
- 200g bread flour
- 300g water (60% hydration)
- 75g levain
- 10g salt
Instructions
The main process is pretty similar to making sourdough bread. I went for 3.5h bulk fermentation before splitting the dough into 8 parts. I formed them into little balls and let them rest for another 2h for second fermentation. Shaping is a very crucial step here as it ensures that the dough does not rip open during baking or later on during filling.
For baking preheat the oven to 250 degrees. If you have a pizza stone, do preheat it as well. I found that using a lower oven rack yielded the best results. Different than to pizza I used a rolling pin to flatten the dough out directly before placing them in the preheated oven. During baking you want the pita to fully rise. They will puff up like blowfish. However, you do not want to fully bake them if you want to freeze them alter on. There should be no golden spots as they will burn when you unfreeze them in the toaster later on. For me about 3-4 minutes did the trick.
Note: if you want to eat them right away (not freezing them) let them bake for about 5-6 minutes.
Journal
###v1
- 300g fine wheat flour
- 200g bread flour
- 300g water (60% hydration)
- 75g levain
- 10g salt
For the first version I tried a more dry dough and tried to stick as much to my usual bread schedule as possible. I went for 3.5h bulk fermentation before splitting the dough into 8 parts, forming balls and let them rest for another 2h for second fermentation. Forming is a very crucial step here as it ensures that the dough does not rip open in the oven. Using a rolling pin I flattened the dough out before baking it for 5 minutes at 250 degree on a pizza stone on the lower oven rack. The bread did rise very fast, creating one big air pocket. The second batch I tried to flip the breads after 3 minutes, though I did not notice much difference in appearance nor taste.
Once out of the oven let the breads cool down in a slightly wet kitchen towel to ensure they stay soft. Once cooled down press out the air for easier storage. I Froze them afterward. To unfreeze them just put them in the toaster. The result was pretty amazing. The crust started to become golden after toasting (which they are not after baking).
For the next time I would go with a more hydrated dough, maybe 65%, as well with fine wheat flour only.
Note: I tried to bake two pitas in the pan, though with no success. Maybe the second fermentation was a bit too short for that to work (ca 45min). The dough did not form the typical air pocked and started to burn fast. A 250 degree hot covered pan was nearly too much heat and the bread nearly burned.
###v2
- 450g fine wheat flour
- 40g full grain wheat flour
- 10g malt
- 360g water (72% hydration)
- 75g levain
- 10g salt
Taste wise this one was pretty good, though the hydration was way too high. Shaping was really hard and flattening them out not as easy as with the former variant.
Next time try to go for 310g water with fine wheat flour, or with with roughly 320g with pizza flour.
Note: The main goal for frozen pitas is that they fully rise, though do not get fully baked. Golden spots will get very dark or burn in the toaster so you want to get them out of the oven once they fully risen.
Flipping them over before they rise might prevent them from rise at all, so I would not do that. If you want to fully bake them in the oven (eg. not freeze them) I would turn them after the rise so they do not get dark on the underside.
###v3
- 750g pizza flour
- 450g water (60% hydration)
40g20g fresh yeast- 15g salt
This yeast based version is supposed to be the fast one. I used some flour and water of the listed amount to activate the yeast during the doughs autolyze.
I let the dough rest for about 1h at a warm place before shortly kneading it again, splitting it into 12 pieces and shaping it. After ca 30 minutes of rest time I rolled the dough flat and placed it in the preheated 250 degree hot oven for 4 minutes.
Note: 40g fresh yeast was too much. The dough was super soft but ripped up too easy. Use 20g next time. With the appropriate rest times this should still work fine.
Note: the yeast based ones are ok as well, though they rip up way easier than sourdough based ones during filling.

